Tutorial:
Making New
Objects
By mike323323
Step 1
Before you do anything in Meteor 2, you need to create your
new weapon’s graphics. To do this, I recommend using a
simple editor like Paint and converting at the end with Advanced
Batch Converter. The graphics you will need to create are:
1-A top view of the object
2-Any frames of movement (you will string them together in M2)
3-A destroyed version of the object
--Optional--
For tanks:
4-Any weapons/turrets you want to put on the tank (Note: In paint, on the edges of the bitmap, there are little dots around it used for stretching it out. The dots in the middle of the bitmap (left and right)
Step 2
Next thing to do is convert them to PCX so M2 will recognize
them. Advanced Batch Converter is great for this. If your trial
has run out, you can also use Microsoft Photo Editor which is
usually included with Windows 2000.
Save them inside your M2 'Objects' folder.
Step 3
Now that your graphics are done, its time to combine them into sprites.
Bring up the top view of the object by clicking Menu>Select Current Frame Image. Then, save it and make a new one. Bring up the first frame of movement you want by clicking Menu>Select Current Frame Image. Then, repeat for each frame clicking Add New Frame. Finally, bring up the destroyed graphic, save it, and quit the sprite editor.
Step 4
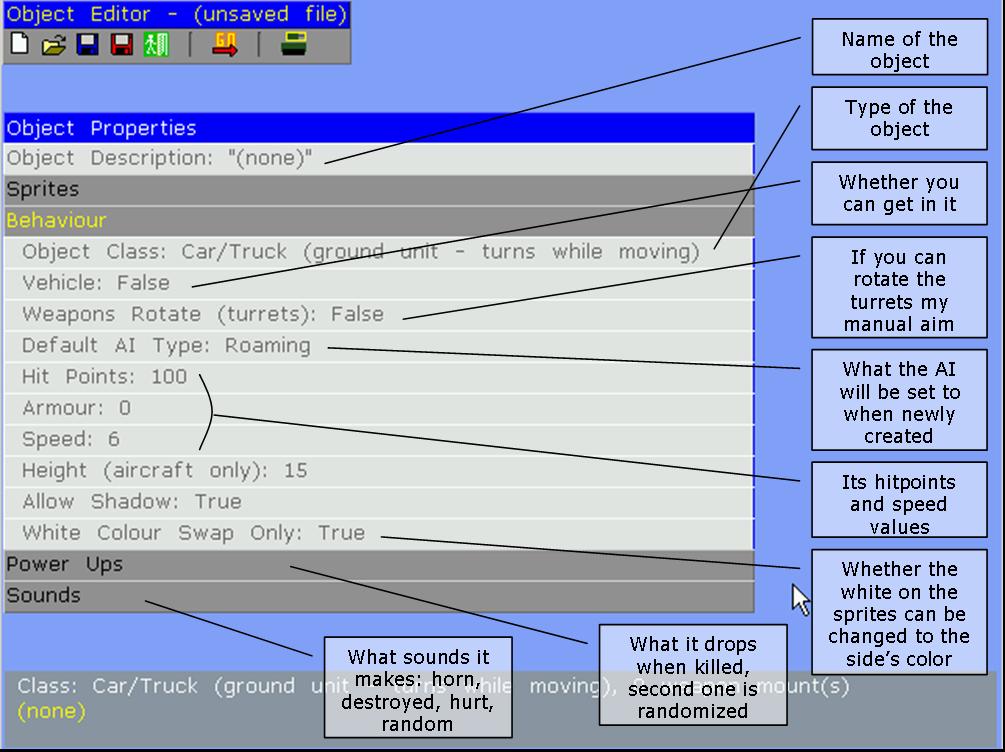
The next step is to make the object. Go to the object type editor and customize everything to suit the desired vehicle. Need help on what each thing means? Click here.
Congradulations, your object is complete!